How to Grow Living Willow Fence? Ideas for Living Willow Fence
Do you know How to Grow a Living Willow Fence? If not, then this guide will help you in doing so. Making a live willow fence to hide a view or separate garden sections is a simple and affordable technique to make a fedge (a cross between a fence and a hedge).
Key takeaways:
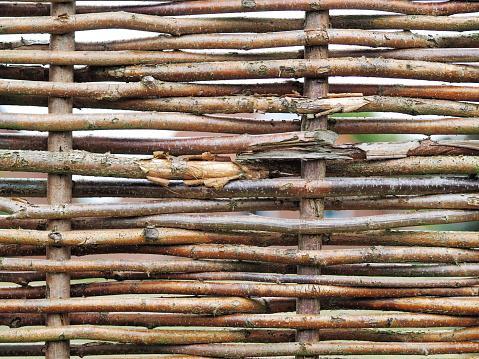
The fedge is commonly created in a diamond pattern using straight, long willow branches or rods, but you can try coming up with your own live willow fence ideas. Because the fedge grows swiftly, up to 6 feet (2 meters) each year, pruning is required to keep the construct in the desired shape.
Let’s begin this guide to learn more about how to grow living will fence.
Planting a Living Willow Fence
The planning of the land is the first step in building a live willow fence. For optimum growth, choose a moist-retentive region in full light, but Salix isn’t picky about soil. At least 33 feet (10 meters) away from any drainage or structures, or plants. Clear the area of grass and weeds. Loosen the soil to a depth of approximately 10 inches (25 cm) and include some compost.
You’re now ready to place your order for willow rods. Depending on the Salix type, specialty growers often sell one-year rods in a range of widths and strengths. You’ll need rods that are at least 6 feet (2 meters) long. The number of rods required will be determined by the length of the fence and the spacing between the rods.
It’s also important to think about where you’re going to place your willow. Moisture and broad sunshine are ideal growing conditions. Because their roots grow quickly, choose a location at least 10 meters away from any structures or pipelines you know about.
The process of preparing a place for live willow constructions is rather simple. All you have to do now is use thread or sand to trace your design form and then place the whips! Everything should be done in the winter or early spring when willow whips are often gathered.
If you’ve already purchased willow whips, soak the thick edges in water to keep them from dehydrating, and then trim the end off before planting. If you do this, be sure the water doesn’t freeze in the winter.
Growing a Living Willow Fence
To place your fedge in the spring, use a screwdriver or a dowel rod to make holes in the soil. Half of the willow stems should be planted 8 inches (20 cm) deep and 10 inches (25 cm) apart at a 45 ° angle in the ground. Then, making a diamond pattern, place the second half of the stems in between, inclined in the other way. For added stability, you can bind some of the joins together.
Mulch the earth around stems to help keep moisture in and weeds out. You may train the new shoots into the current pattern to make it higher or weave it into barren spaces as the roots grow and the willow develops.
The broad end of the whip should ideally be buried 20-30cm underground. The deeper it must grow, the drier the earth or the longer the rod. However, due to the willow’s amazing proclivity for growth, you may easily end up with a blooming structure regardless of where you put it!
When planting, some compost should be added to the soil. Willow plants also improve the soil around them, allowing other neighboring plants to thrive as long as the roots of the various plants don’t get in the way. You may also wish to wrap a strong weed sheet around the structure’s base to prevent undesired shoots from growing where they aren’t intended.
Various Ideas for a Living Willow Fence
Living willow structures come in a variety of designs:
1. A living willow arch or pergola
Plant a row of willow whips one on each side of a wooden pergola or arch, spaced 10-15cm apart, using the tallest willow whips you can find.
Allow them to grow straight up to the top, then tie them together. It’ll appear thin at first, but tying additional shorts into the framework will help it fill up (just don’t aim them downwards or they’ll die).
The end product will be a nice natural-looking area for shade, reading, or whatever else you can think of.
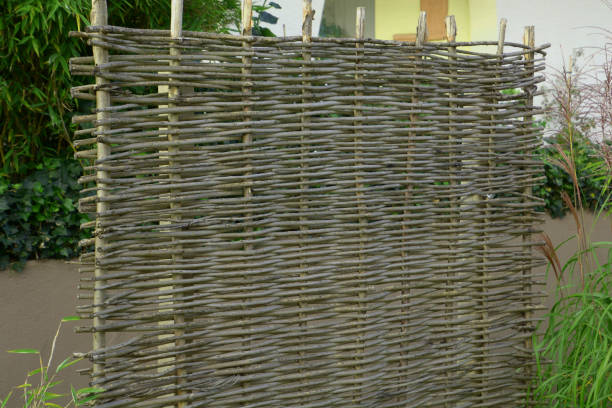
2. A living willow fedge
Willow fedges are a hybrid of a fence and a hedge. It may be utilized as a more organic-looking fence option, far more intriguing than a brown-timber wall. They’re an excellent method to separate and partition off your garden, allowing you to create distinct rooms or zones.
Plant a solo row of long willow whips about 10 inches apart in alternate directions, each bending at a 45-degree angle. You’ll be able to string a lattice-structured fence that you may trim to the desired height. It’s that easy to make a willow fedge.
3. A living willow dome or wigwam
These are more difficult to install, but they make great kids’ play areas or backyard picnic sites – albeit they aren’t guaranteed to be watertight. Plant long, robust willow whips approximately 12 inches apart in a big circle to build a live willow wigwam. With the strongest whips on either side of your doorway, leaning in alternate diagonals.
Then, depending on how wide you want the walls to be, bridge that gap with smaller willow whips. Then, towards the top, weave the tails together to form a lovely interweaving roof. Alternatively, for a simpler job, just wrap them together to form a tepee-style roof.
Why a Willow Hedge?
It is used to stabilize, slope stabilization and soil erosion control. You need to plant the yellow has on the border of the streams which will help in interlacing the roots of the plant to protect the bank action of water. The willow hedge is used to have larger roots than the stem of the plant. To know how to plant them you need to control reading the article.
Building of a Willow Hedge:
- For building the willow hedge you need to make a hole in the ground by using a metal bar so that you can insert the willow cutting into it.
- You need to make sure to have weed control. So you need to plant the willow hedge and the cutting into a weed barrier which will allow the water to penetrate.
- The shorter cutting of the willow hedge grows best without any competition from weeds but the longer cutting does store more energy and will be a bit competitive for weeds.
- To grow willow you need to provide them full son and water them as per the conditions.
- The top of the willow should be tied to a horizontal and weaved in a witty way to give it stability.
- They are used to produce high levels of auxin hormones.
- The angle rod will begin to sprout out but the upright rod will take time to sprout.
- The branches are struck vertically like a wood frame with tall and straight branches which make it intertwined into a frame. Due to this it raises problems near the drainage area.
- You need to avoid plants close to any building as the roots are used to grow in aggressive and large sizes.
About the Article
Making a live willow fence to hide a view or separate garden sections is a simple and affordable technique to make a fedge (a cross between a fence and a hedge). In this article, we discussed the ways to grow living willow fences. People also use designed old living willow fences in their gardens to make them look more like older times. We also discussed the different ideas for structuring the living willow fence. The above information will let you help a lot.